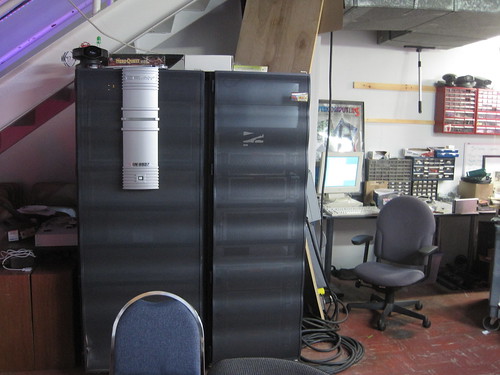
A Long Cray Supercomputer Weekend
Some more progress was made on getting the Cray J932SE supercomputer running at the lab. Using information from the logs of the friendly people at Cray-Cyber and doing some hacking on our own, we made it through part of the install process that hasn't been reached before. That is the good news. The bad news is there is a program or two missing from the Sun Workstation that appears to be required to actually install the UNICOS operating system on the computer. Feelers are out on the Internet and hopefully we will figure it out soon! Stay tuned.
Finalizing the Laser Engraver
VaShadow jumped in and pushed the laser engraver project ahead and now it's near completion. When we left off, Vex had completed the embedded controller that handles the pulse width modulation of the CO2 laser. Thanks to VaShadow, the engraver is now nearly encased in a box setup to keep the work area clear and push any bad smells out of the lab. TJ cut the metal that lines the inside of the box around the laser bounce area. The box is adapted from the original Meistergram layout and includes some needed adjustments.
Chances are it will be running again today, only this time with a nice safe enclosure! Many thanks to VaShadow for helping on this!

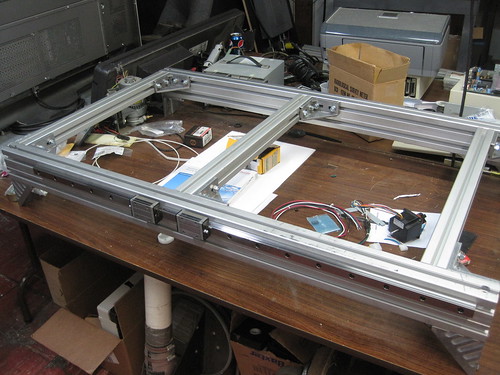
CNC Router Progress
Someone recently asked in a comment what the progress is on the CNC router project. The good news is the Bosch T-nut parts *finally* arrived from L&H. Combined with some M5 screws from the local American Maintenance Supply, I was able to mount the NSK linear slides to the Bosch extrusions. I also picked up some bolts to mount four corner parts to the underside of the frame to elevate it, making room for the center drive down the middle for the long axis.
The next step is to cut and drill out the aluminum plate that will form the sides of the gantry. I also need to get the proper saw blade to cut the aluminum extrusions so I can mount the 45mm x 90mm extrusion across the gantry. Cutting out the hole for the stepper motor seems like it is going to be difficult.
Progress is happening, just a bit slowly. The good news is the next post that is going to contain information about the laser engraver project. :-) It's rapidly progressed.
6-Axis Robot Comes to Life at a Lower Level
The 6-axis American Robot Merlin arm that was kindly donated to the lab by our friend Ken Kurzweil shows new signs of life! Nathan and Adam have been working with it recently. They are working on adding more support to the open-source EMC2 software for 6-axis robots, including teaching pendant support. A DIO card is needed for the host computer to facilitate hooking up the optical encoders and additional stepper drivers.
Here is a video of the robot motors moving based on sine and co-sine functions controlled by the lower HAL layer of EMC2:
http://youtu.be/WBDTU-sSixo
One Printer to Rule Them All or Makerbot 3D Printer Now Alive
If you have been by the lab in the last two months, you may have noticed the addition of a new 3D printer: A Makerbot Thing-O-Matic. This device grants us the ability to print objects using ABS plastic (think LEGO brick material) or PLA (a "green" alternative made from renewable material). Check out this young inventor explaining 3D printing.
So, what does this mean for the lab? It means that we now have another piece of equipment in our growing tool set to aid us in our projects. Whether serious or just goofing around (such as scanning people at the lab and printing mini-figurines), the 3D printer is available to members who have taken the training class. The first class graduated two weeks ago and now it is time for the next round for those who are interested.
A little bit about the build process and our results:
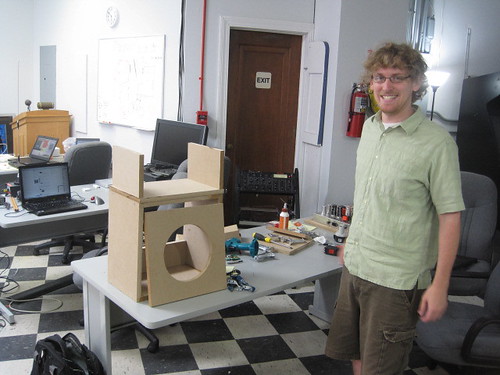
The Makerbot Thing-O-Matic is available as a do-it-yourself kit or, for a higher price, prebuilt. We chose the kit, which came in one box with everything seen below (except for the soldering iron, courtesy of Kyle).
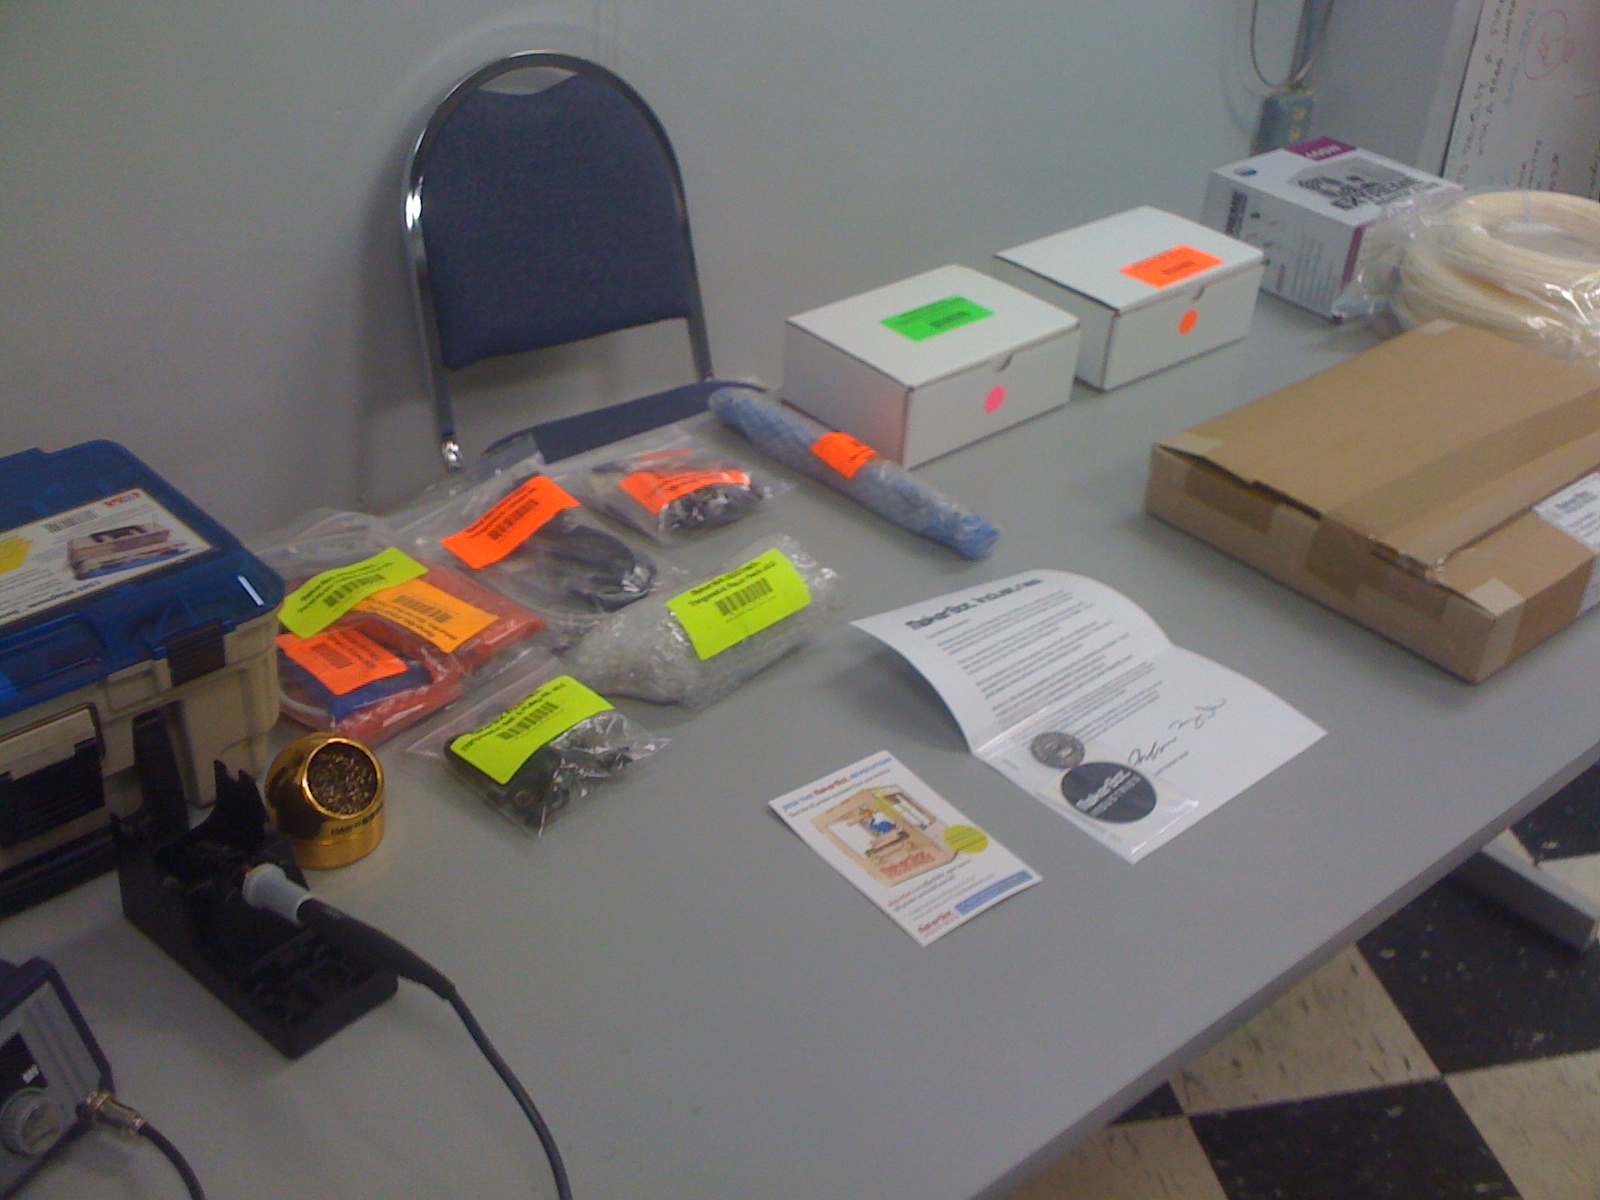
Unboxing
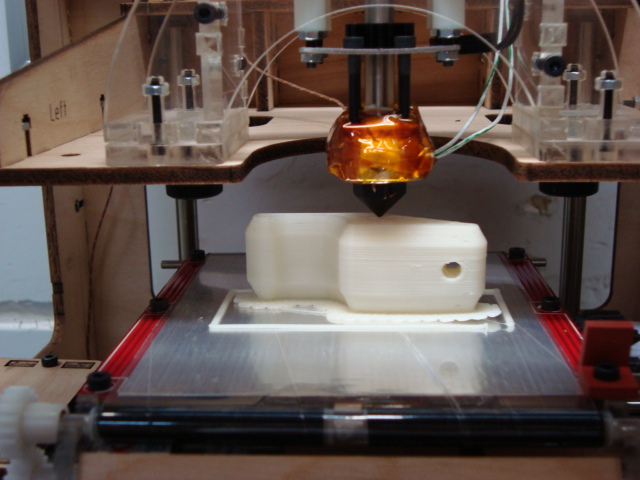
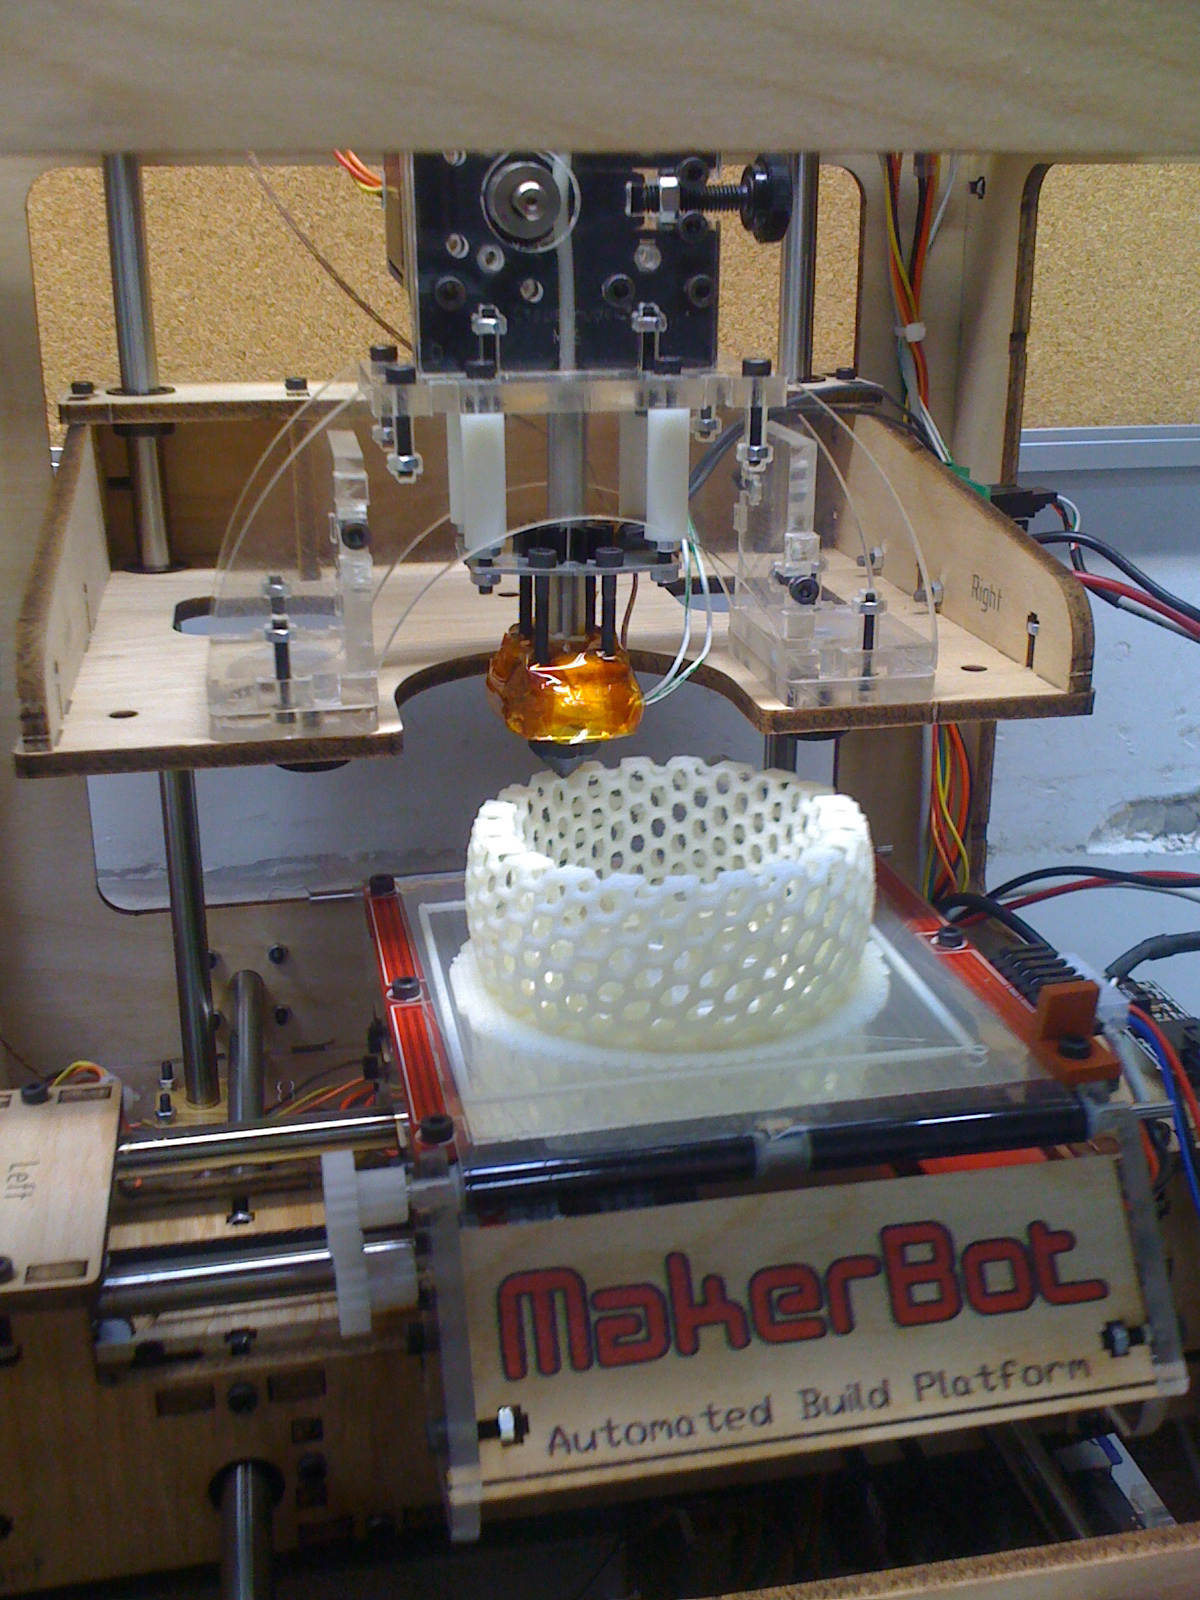
We put about 16 hours total into the build, spread out over the course of a week. In the beginning you have to choose one of three types of "build platforms," which is where the material is extruded onto. The kit provides just enough parts to build only one of the three. We elected to use the Automated Build Platform. In theory, this platform allows us to print dozens of items without any intervention. Once an object is printed, the object rolls forward using a conveyor belt where it is pushed out into a collection bucket. After the platform is cleared, the printer continues to print the next object. Our choice in platform may change over time but has been printing quite nicely over the past month as shown in the image below.
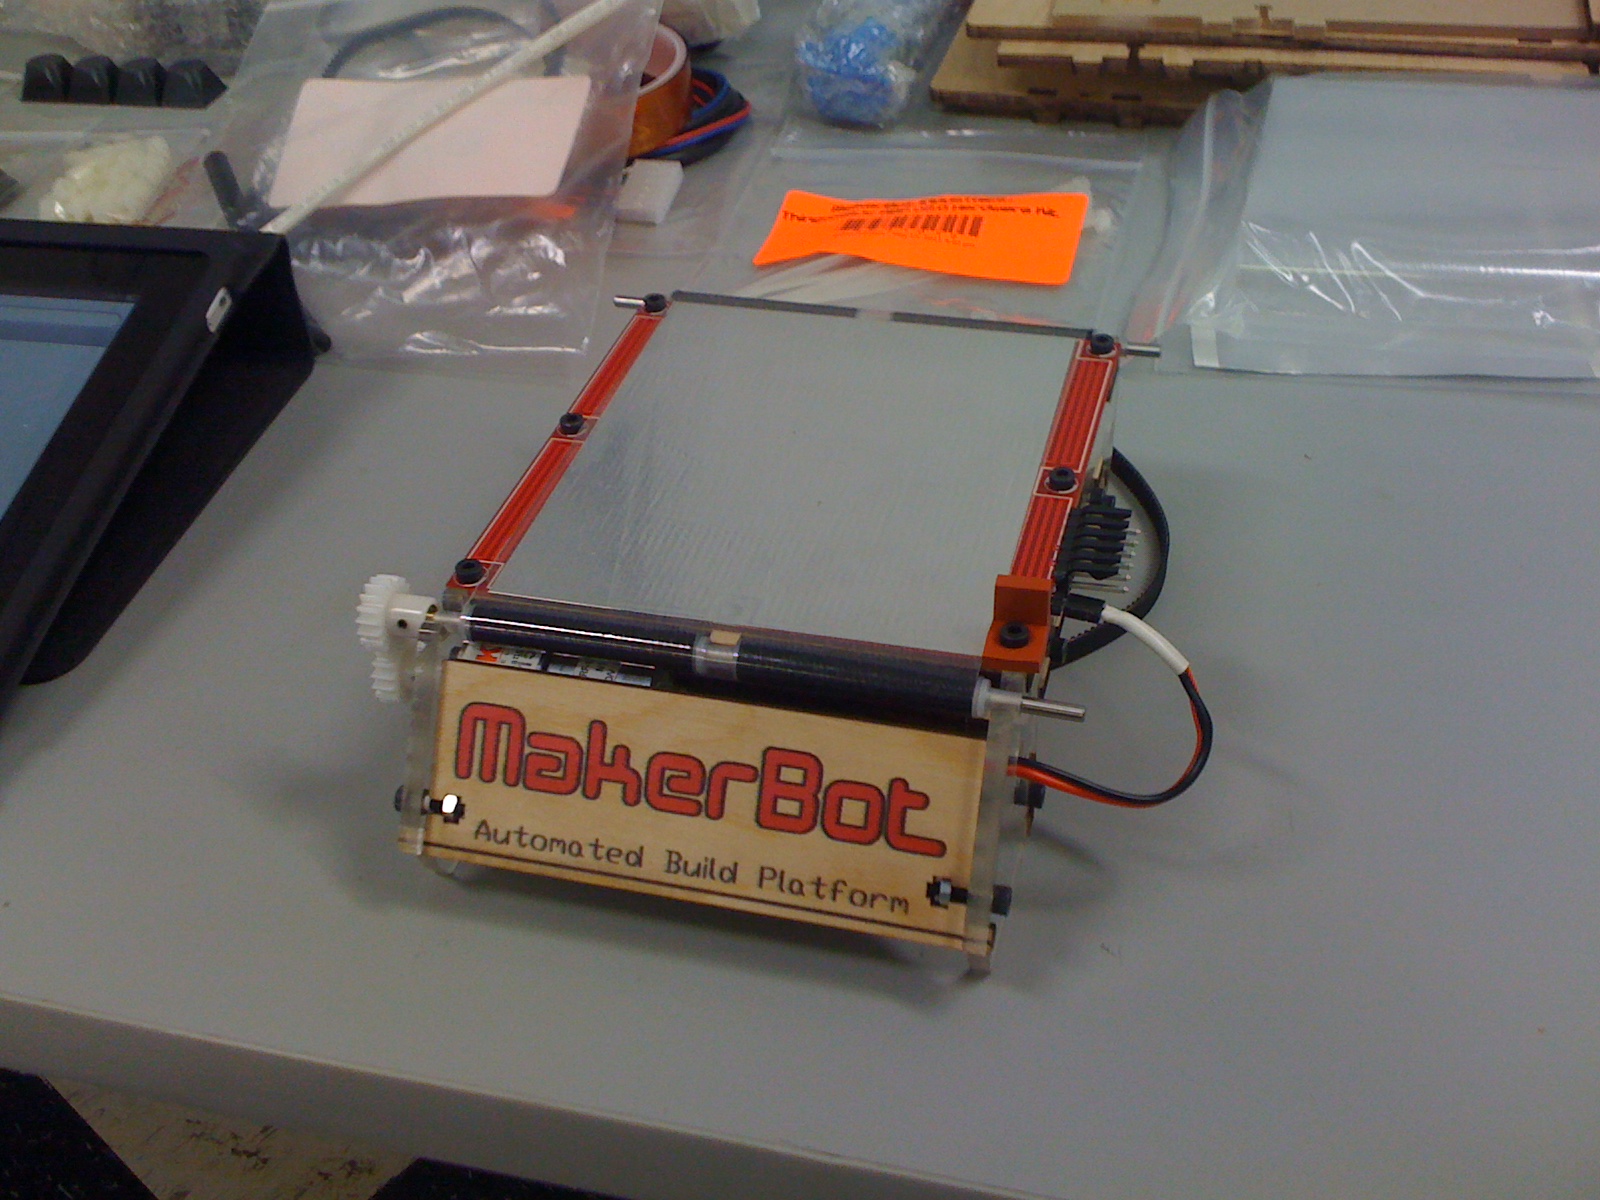
Automated Build Platform assembled
Everything went together pretty easily, for the most part, requiring only two small hacks: A single stepper motor driver cable was lengthened as it was too short and an extension connector to the power supply was built to accommodate the Automated Build Platform.
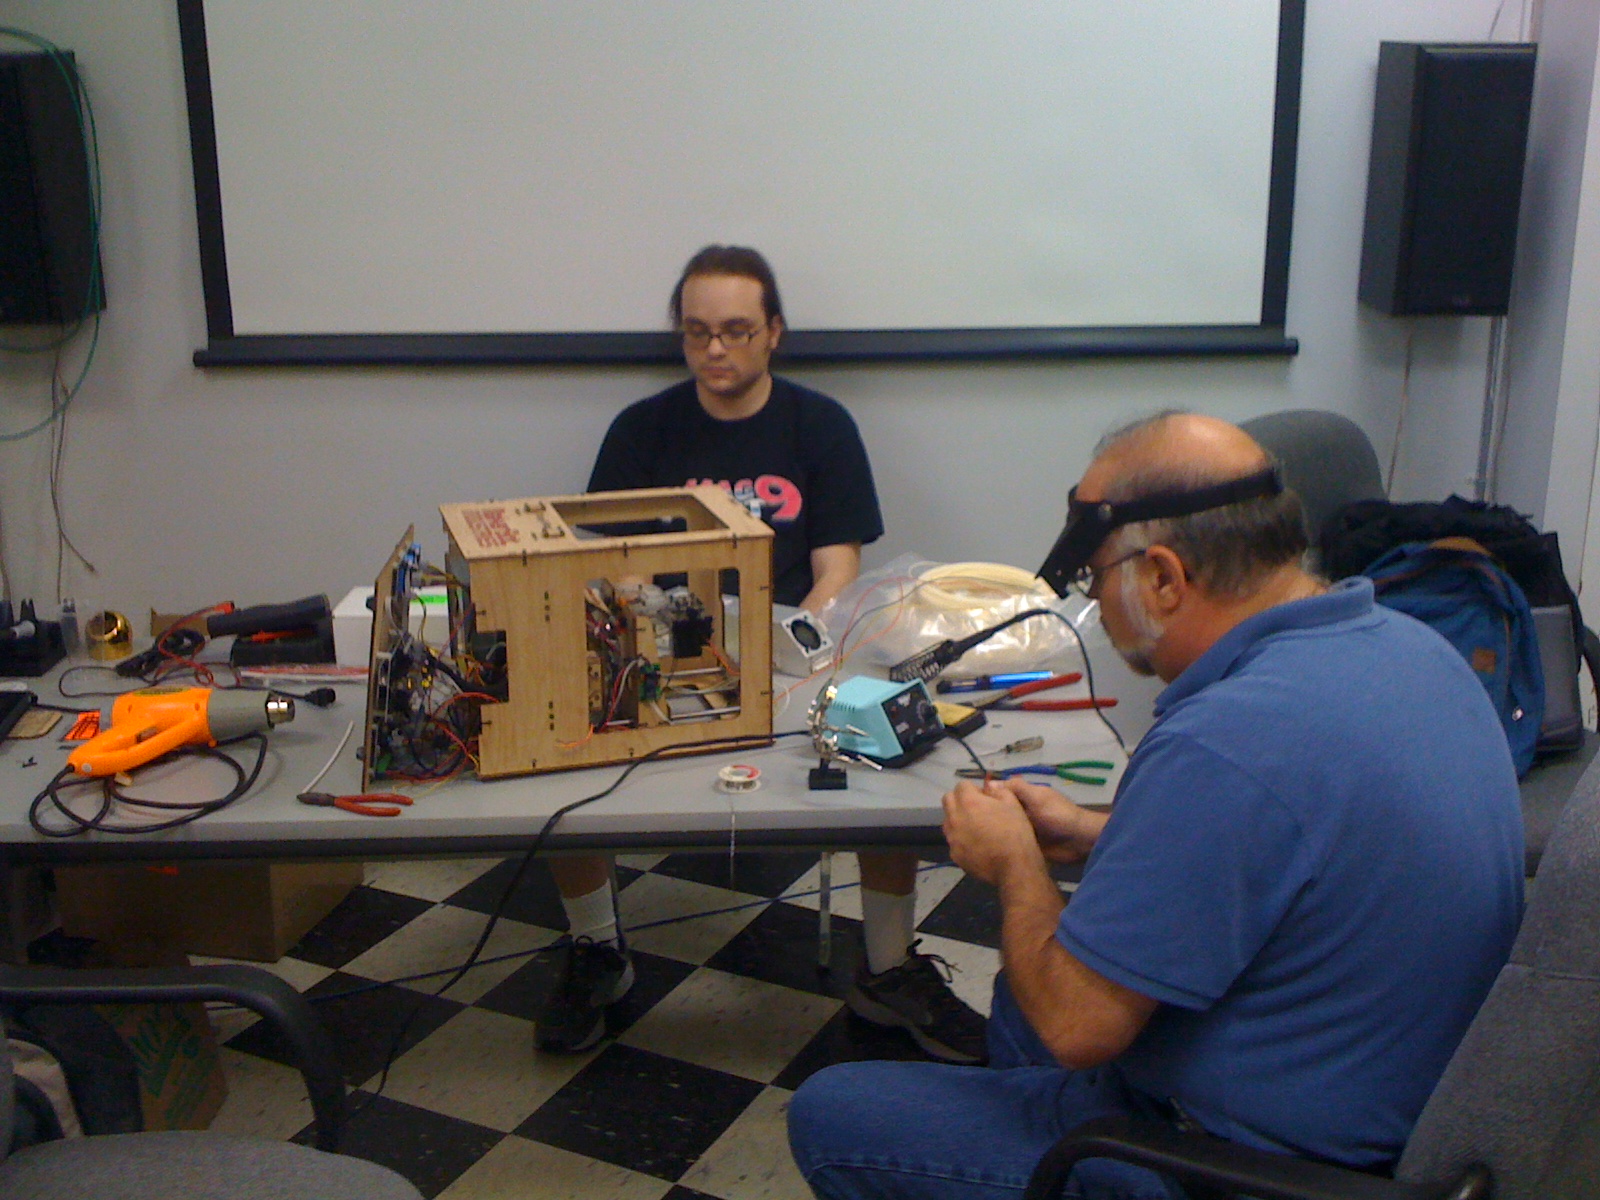
Makerbot build coming together courtesy of help from DJ Mike and Harold (once again sharing some great soldering and electronics knowledge)
Once the installation was completed we had to install and learn some new software that is used to drive the system. You can use most any CAD or modeling package (such as Google Sketch-Up, Blender, AutoCAD, etc.) for designing parts. All that is required is to export the model to .stl (stereolithography file). From here, you use ReplicatorG and open the .stl file after which you have access to a number of settings for "slicing" the model before printing with the Makerbot.
Printing a part
ReplicatorG uses built-in Skeinforge scripts to provide literally hundreds of minor tweaks and changes to fine tune and control your results. After completing calibration (or at least calibrating to a point we considered decent), we started moving to increasingly complicated builds. We have spent the last month running print after print, tweaking settings to provide a good starting point for those interested in printing.
Larger parts
We are pleased to open this tool up to more members of the lab for use in projects. If you already know any of the many CAD or modeling packages out there, you can make your own designs to print. Of course, we are also supporters of the open source design movement found over at Thingiverse. Spend some time browsing and you may find what you need already created or easily adapted!
If you want to get started, the first step is to take a class on working with the machine. More details on the specific settings we use (currently tuned for our cold environment) and how to use, best tips, etc. on our Wiki.
Enjoy and happy printing...
RockBandDrums to MIDI (using Python)
For Art|Everywhere one of the projects for the event was 6 sets of Rock Band video game drums hooked through a laptop computer to a MIDI controlled Yamaha synth module/drum machine (RM1X.)
The python script that allows rock band drums to drive midi devices is online at:
http://users.757.org/~ethan/pics/geek/projects/drums2midi/
See the wiki page for the project at:
http://www.757labs.org/wiki/Projects/RockBandDrumCircle
The script is easily modified to relay any sort of USB game controller through to midi, and should be useful to run RockBand guitars and other controllers.
MADExpo and Art|Everywhere Closing Ceremonies (July 1st and 2nd)
This 4th of July weekend has started off with a few happenings. The Lab went to Hampton for the Mid-Atlantic Developers Expo (MADExpo) on Thursday and Friday to show off a few projects. Saturday was the closing of the Art|Everywhere event that has been running on Granby Street the last few months

Ethan at the 757Labs booth at MADExpo.
Ethan is discussing 757Labs to attendees at Mid-Atlantic Developers Expo in the Hampton Roads Convention Center. Slide-show of the Lab and past projects, LED Cube on display, development progress of the Laser Pong, and Space Balloon box. MADExpo was a great convention for a first run and we currently plan to return next year.

Mike and the Drum Circle at Art|Everywhere closing.
Mike runs the Drum Circle on display at the Art|Everywhere closing event off Granby Street in Downtown Norfolk. Kids were scrambling at the chance to bang on the drums and have a good time while enjoying the weather. Some buttons on the drums gave the player a toggling ability to change instruments and octaves, adding to the chaos and entertainment of those who stopped by.

Laser Pong on display at the Art|Everywhere closing.
The Laser Pong game was set up next to the TCC building and had a handful of the young and old stop by and play some Pong, 757Labs style. There are still bugs to be worked out, but it added to the quirkiness of the game and was entertaining to many. The hope is to re-platform the game to remove the Linux system reliance out, leaving only Arduinos. Expect an interesting twist to the game in the future!
Weekend Recap (June 24-26), MADexpo
Over the weekend there was a good amount of activity at the lab.
From what I remember:
Fri : Ken stopped by and demoed his bar code scanner, which is capable of scanning the Virginia drivers licenses. My social security number is embedded on the back of my license, who would have known.
Other: Vex continued work on his custom tube guitar amplifier. It's looking sweet.
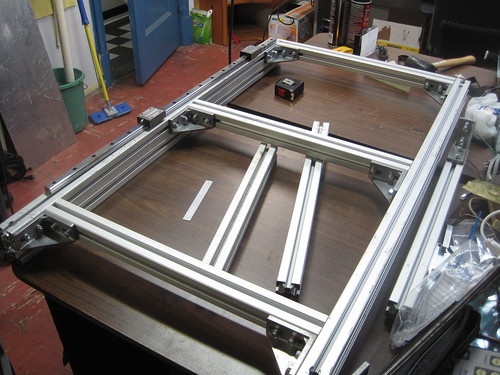
Steve helped with the assembly of the base frame for the new CNC router. Yes, we've been down this road before. This is going to be the one though! Not too big, not too small Just right. And made of aluminum extrusions and such.
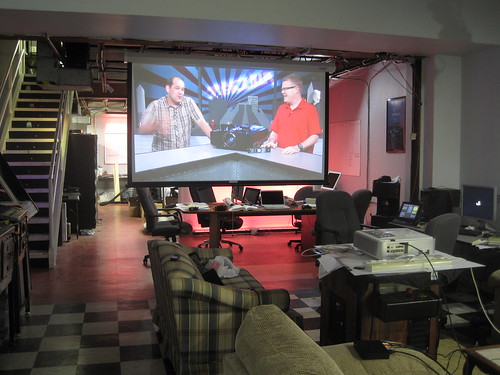
Some new donations and new faces around the lab! Thanks to Mark G we might be on our way to getting the middle projection screen in use. A project to motorize it is on the mind. Also Justin gave us use of his Roku box, which is going to be integrated with the AMX automation system. The open development platform of this device is interesting.
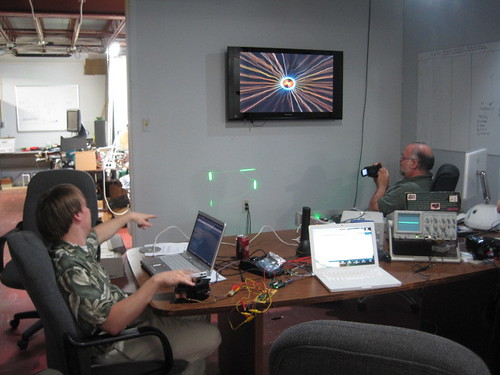
Monday brought forth another busy night. Between Android developers meeting, ROV interest (and talk of 3d printing propellers), laser scanning an object using the MakerBot laser scanning software, there was no time to slow down!
Thursday and Friday we will have a table at the MADexpo in Hampton.
Saturday we will be at Art|Everywhere with the Rock Band Drum Circle and Laser Pong projects.
CNC:
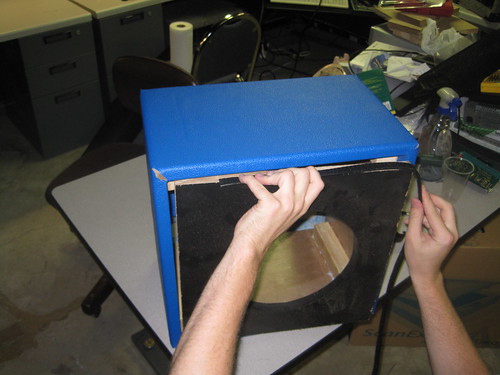
Vex's Guitar Amp Custom Speaker Cab:
Roku driving projector on middle screen (stability undetermined):
Note: Ethan did a bunch of research into some of the dead flat panel TVs at the lab and posted some stuff on the wiki. More information forthcoming, but problems have definitely been identified.
Weekend in Review
A few things from the weekend. With pictures, as promised!
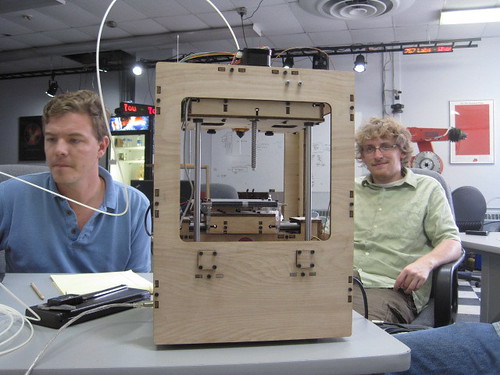
Beau brought the MakerBot to life. It's a very impressive design. Calibration process is going on:
Christopher worked on building a custom amplifier and speaker cabinet. It will house the tube amplifier he already made. A mini stack design:
The microcontroller code finally works for the laser pong game for the upcoming Art|Everywhere closing night. Harold contributed hardware-wise, Ethan some hardware and software, and Matt software.
Other stuff:
David dabbled with JSON calls to XBMC running on an Apple TV that will be running a screen up near the front window of the lab. Dave worked on repair of a chicken toy for a friend. Mike was working on monitor stands for his LCDs. Just a few items that was going on.
CNC router table was disassembled. Ethan wants to re-do it in T-slot once some surplus T-slot can be sourced.
Open Hack Night this Friday (June 17th)
MakerFaire NC on Saturday (June 18th)
Weekend in Review
Just a few things that were documented with photographs from over the weekend:
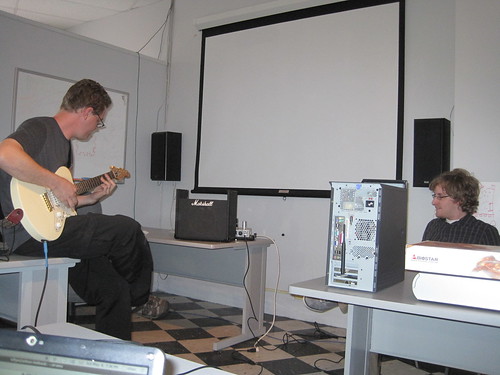
Beau jams on Vex's self made tube amplifier. They are working together to build a custom cabinet for the amplifier and speaker.
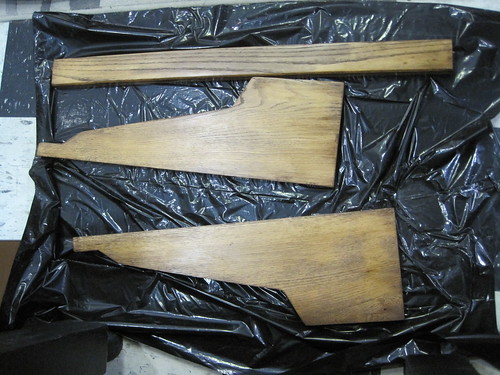
Mike sanded and restained the wood pieces from the Radio Systems ESA-10 console. Graffiti is all gone. Some other work was done as well to finish up restoration of this broadcast console that spent it's earlier years at William & Mary's college radio station.
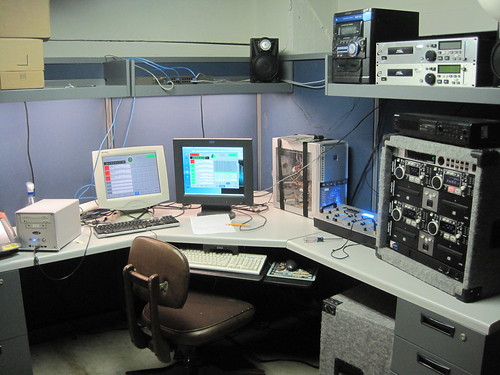
Radio757 is coming along. Touchscreen was tested (will replace the computer) and equipment racked. Next step is console integration and microphones. Cables should arrive today.
There was definitely other things going on as well.
Progress was made for the drum circle python code (Rock band drums to MIDI.)
Matt, George and Mike started coding and designing an Android game. It's an exercise to get familiar with development on the platform. I believe the plans are to release the game for free. Very cool that app development is underway at the lab.
There was definitely other things going on as well, but this is a short recap of a few things happening.

Location
Google Calendar
@757Labs
- No public Twitter messages.
Links
User Groups
- 757 CCC Comic & Cartoon Creators
- 757 Objective C Group Objective C and Cocoa programming group.
- 757 Python Users Group
- 757.rb Ruby Users Group
- HR Geeks Hampton Roads Geek Community