Website restored, Wiki will be next
After I moved from Hampton Roads to Northern Virginia, I terminated the Cox business internet connection and migrated the data from the servers to a new-used 1u HP which is now in a beautiful tier-1 colo facility in Ashburn. This process involved changing lots of DNS entries on various websites with various registrars handling domains owned by different people.
Unfortunately it wasn't the smoothest of transitions, and a few sites still have to be corrected.
757labs.org is now corrected, and I will work on the wiki next.
Much thanks to people who helped with the migration, including Vex, Jody, Misfit, Sean, Erik, Skhisma and anyone else I'm forgetting.
Radio757 has been up for a few months and the audio portion is returning to that. I am going to continue with that project and am also working to expand it as well. More to come on that. Of course the IRC server was the first thing to get restored, #757labs on irc.757.org as always.
Scanning Electron Microscope Update
Over the past month, Ken and I have been troubleshooting the Cambridge Stereoscan 200 scanning electron microscope that was donated to the lab. The machine was sitting in a barn for a while and was quite dirty when we received it. After vacuuming out dust and rodent debris we noticed that the power distribution chassis was behaving very erratically. Several rotten capacitors were replaced and some connector terminals required attention due to corrosion from exposure to uric excretia. Replacement or refurbishment of those parts solved the chassis's stability problems and allowed us to examine other parts of the microscope.

Me (left) and Ken (right)
The embedded display screen on the control desk unfortunately does not power on yet, but a BNC jack located at the rear of the desk is able to output a video feed to an external television. A primitive computer located in the control desk adds an overlay to the video feed which displays microscope settings such as magnification and working distance, permits simple linear distance measurement, and allows the user to input annotations for recorded micrographs. The computer is constructed from several 7400 series integrated circuits, some of which contained corroded pins and sockets which were replaced. Now that the computer appears to be fully functional, it will be helpful when making sure the rest of the controls are functioning properly -- for instance, right now we can tell that the spot size selector switch needs to be cleaned because the computer doesn’t react properly to some selections.

This one goes up to 30!
While we have made some significant progress in our repairs and understanding of how the microscope electronics work, we have not given much attention to the vacuum mechanism. The primary vacuum pump is a turbomolecular pump and there is a rotary vane pump backing it. Both pumps need at least an oil change before they can be earnestly tried out because they were left unused for an extended period of time without being properly prepared for storage. We will also likely need to disassemble the rotary pump to get an assessment of its condition since it did not spin during a cursory test. None of the high voltage supplies (for the electron beam filament, display CRT, etc.) will activate before a reasonable vacuum is achieved. There are also some minor electrical problems remaining that are observable in the current state. In addition to cleaning some of the front panel controls, we should evaluate the electron optics and deflection circuits and be sure that they look okay.
We’ve had a blast working on the microscope so far and look forward to the day that we achieve beam!
New Lab Addition – Scanning Electron Microscope
Just a heads up: 757 Labs recently received a new donation of a scanning electron microscope. Feature-wise it seems to stack up to (or exceed) capabilities of newer units. The unit was working when decommissioned. It has created some excitement and ideas for new projects! More information to come and much thanks to the donor.

Cambridge Stereoscan 200
Our Second 3D Printer Enthusiasts Meeting, April 7th, 2012
Hello 757 Labs friends,
There has been a good influx of interest in 3D printers and related technologies in the past few months along with more members purchasing kits (RepRap variations, Makerbots, and talks of a couple PrintrBots in the area). So lets get together and share what we have and work on the ones that need some help or time to get up and running.
Date: April 07 , 2012
Time: 12:00 - 3:00 PM EST
Location: 233 W. Bute St. Norfolk, VA 23510 in the 757Labs Front Conference Area

3D Print of a Penny Bottle Opener
If you have an interest or want to see some 3D printers up close come on by. If you have a kit or a completed printer, bring it with you and let's share and contribute together!
NOTE: This event is open to the public, so come on out and join us!
3D Printer Enthusiasts Meeting 2/25/2012
Hello there fellow 757 Labs friends,
There has been a good influx of interest in 3D Printers and related technologies in the past few months as well as more members purchasing kits (at least 4 reprap variations and 3 5 more Makerbots that I know of in the area). So lets get together and share what we have and work on the ones that need some help or time to get up and running.
Date: February 25, 2012
Time: 12:00 - 3:00 PM EST
Location: 233 W. Bute St. Norfolk, VA 23510 in the 757Labs Front Conference Area
3D Print of a Penny Bottle Opener
If you have an interest or want to see some 3D printers up close come on by and if you have a kit or a completed printer, bring it with you and lets share and contribute together!
NOTE: This event is open to the public, so come on out and join us!
If you are planning to come, please respond or comment so that we can be sure to order the right amount of food for those attending.
Shmoocon 2012, 757 Labs and Harbor Freight
Last weekend was quite exciting, as a few members of 757 Labs built a project for Shmoocon. It was an audience feedback moose that took feedback via an internet website and visually (then audibly) responded. The eyes were BlinkM LEDs and the audio feedback was done by means of a Harbor Freight airhorn kit powered by ham radio power supplies.
Of course, being a con project, it was a bit last minute. Planning and software started much earlier, but it's just how things go. One huge last minute issue was when a relay failed. This relay was supplied with the Harbor Freight airhorn kit, and was used to switch the high current load of the compressor by means of the the microcontroller which was triggering the relay by means of a MOSFET.
After only a few tests the relay seemed to fail. One would guess the transistor failed, given that it's a 40 amp automotive relay. This failure, however, seemed to echo some online comments about the air horn kit.
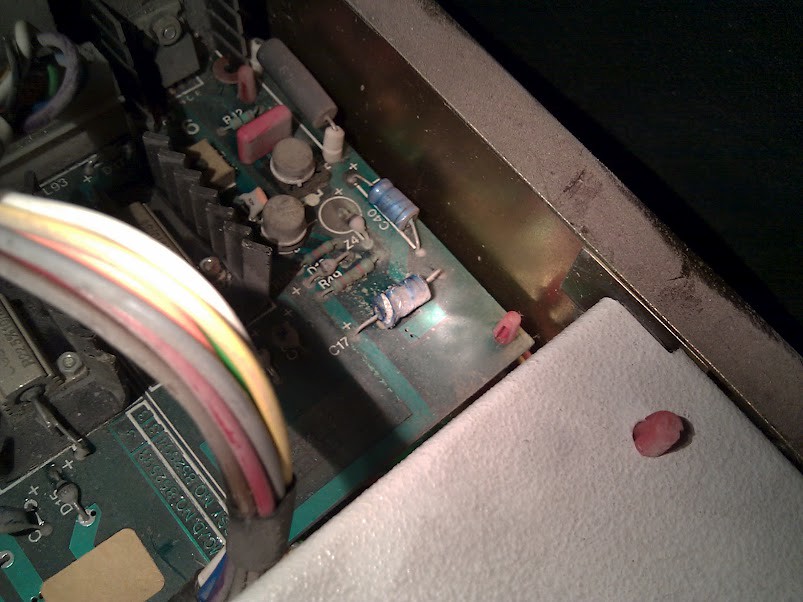
Before heading to Radio Shack, I popped the top on one of the relays and low and behold, it's a lie. The 40 amp relay is really a fake case on a 5 amp relay. It was purposely made to look like it was a heavy duty 40 amp automotive relay, when it is not! I've heard about Chinese vendors doing this with capacitors, but never have witnessed it in real life. So here you have it, the 40 amp relay included with the Harbor Freight air horn kit is a lie.
The fix was ultimately to go to Radio Shack and pick up some replacement relays. A few taxicabs and a few Radio Shacks later relays that looked pretty similar to the Harbor Freight ones were in hand, but the Radio Shack ones weighed quite a bit more. We had 3 of the air horn kits, and sourced 3 replacement relays. The air horns draw at least 20 amps, so there is no way the supplied 5 amp relay (mocked up to look like a 40 amp relay) would last very long.

Relays before removal of cover. "40A" automotive relay

Relays after removal of cover. It's really a 5A PCB mount relay!
Unfortunately this delayed the airhorns until mid-day Saturday, as the Radio Shack nearby in the city closed early.
I wonder if Harbor Freight knows their supplier is lying to them?
Circuit Board Creation – First For The Lab
Members of the lab have finally started creating custom circuit boards for projects. The first is a custom board based on the electronics done for last year's high altitude balloon launch. The purpose of the board is for this year's entry into the Hackerspaces in Space high altitude balloon contest.
It took numerous tries, but progress has come around! More information to come once the board is fully populated.
Currently we're using the technique of transferring toner to a glossy surface, then ironing it onto the copper PCB surface, then etching with cupric chloride or ferric chloride.

Nice traces!
iRobot iCreate-Based Robot Project
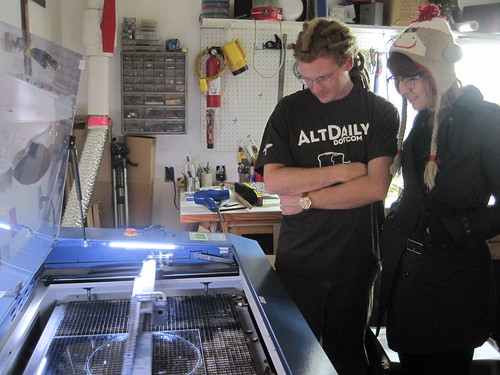
Jamie is working on building a ROS-based robot that looks pretty exciting. It's an open source robot which, once assembled, offers a good starting point for software creation. It uses a Microsoft Kinect, a netbook, and a iCreate (based on the Roomba vacuum cleaner).
Angus of Hines Design Labs cut the acrylic on his laser cutter as it's larger than the lab's. More info to follow on this neat project!
First 757 Labs Hackerspace Passport Stamp Granted!
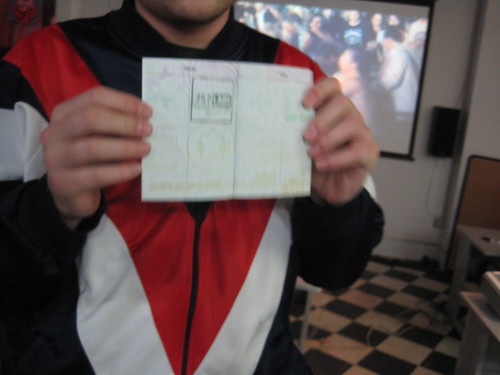
Mitch Altman of the hackerspace Noisebridge in San Francisco made a large quantity of Hackerspace Passports and has been selling them at a remarkably low price. These neat little passports were created with the idea that hackerspaces could create stamps for them, and stamp the passports of visitors that come to their space.
On Saturday October the 22nd, 757 Labs had two visitors from the HacDc hackerspace in Washington, DC. ITechGeek and HaxWithAxe arrived around midnight after visiting the Fredricksburg, VA hackerspace. The good news is our members created a temporary stamp by laser etching wood and acrylic. The acrylic didn't absorb the ink well enough, but the wood version did the trick! ITechGeek is the first visitor to 757 Labs to receive a hackerspace passport stamp and 757 Labs is the first stamp in his passport. While the physical stamp is beta, it's the permanent design of our stamp.
Some great news is that Angus has cut the design on his engraver in real stamp rubber. He also improved the second layer stamp which wasn't ready yet, but is to be stamped in UV ink.
In the past, 757 Labs has welcomed visitors from Houston's TX/RX Labs, Freeside Atlanta, All Hands Active in Ann Arbor Michigan, The Cowtown Computer Congress in Kansas City, one visitor from the Netherlands, HacDC, and most likely some others. If you're coming to the area, feel free to drop us an email, jump on the public mailing list (link is over on the right), or join #hackerspace on irc.757.org to catch someone. We can easily accommodate any time/day.
In the future, for those participating with the hackerspace passports, we'll have stamps for you!

Solar Boiler Update
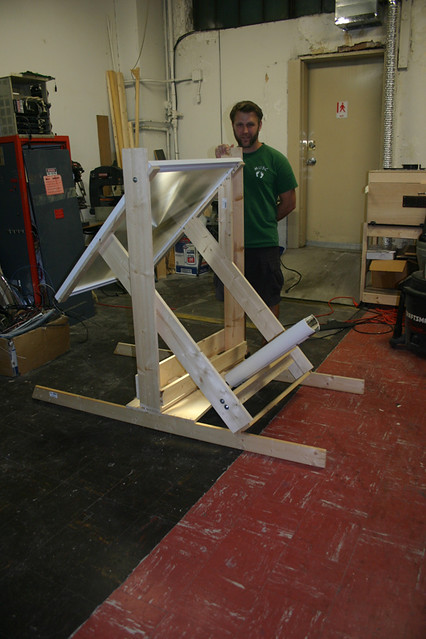
I've gone through quite a few iterations of the solar boiler. The current version uses a 47" Fresnel lens to focus sunlight down to about 1 square inch. The sunlight will focus on an evacuated tube that will transfer the heat into water. The aim is to boil the water and turn a steam engine, ultimately turning a motor and feeding clean energy into the grid. The solar boiler can now pivot in two dimensions allowing it the ability to track the sun as it moves from east to west from the morning until the evening and from north to south as the sun moves between winter and summer. The next step is to build in the tracking system which will consist of two stepper motors that will turn screws pivoting each of the two dimensions to follow the sun. We'll then tie in an MCU attached to some photocells to track the movement of the sun. After the tracker is built the boiler section is next. Honestly, I'm a little nervous about pressurizing steam. That episode of the mythbusters where they blew up the water heater has me a little on edge.

Location

Google Calendar
@757Labs
- No public Twitter messages.
Links
User Groups
- 757 CCC Comic & Cartoon Creators
- 757 Objective C Group Objective C and Cocoa programming group.
- 757 Python Users Group
- 757.rb Ruby Users Group
- HR Geeks Hampton Roads Geek Community